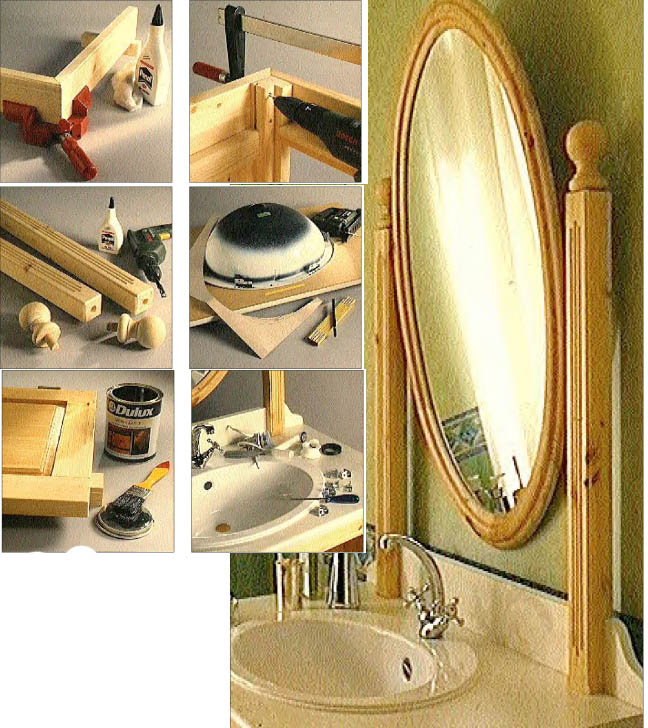
 The images on this page are intended to familiarize you with the work, the consequences, when all the frames are glued together. For example, making the frame, connecting the frame and body as well as inserting and installing the washbasin. In this way, you can estimate and assess the scope of work and the requirements for know-how and tooling more easily, whether rebuilding this piece of furniture gives you more pleasure than a headache.
So that the decision pendulum swings in the direction of joy, we offer you a detailed construction plan for this washbasin, on the more photos, Detailed sketches and work instructions are printed. With the help of the detailed, extensive parts list, cutting the individual parts will not cause you any major problems.
Stability through traditional craftsmanship
The is cut to miter and glued 10 cm high frame, which supports the vanity top. Use strong miter clamps for gluing.
Two long Spax screws per stud: This is how you should connect the frame to the body. Pre-drill screw holes, Align the frame with a spirit level.
Decorative grooves also loosen up the front of the two mirror bars, whose edges are chamfered or profiled. Decorate the bar ends with a ball knob.
Into the tabletop 6 the enamel built-in washbasin is left on (Repent). Mark the cutout according to the template, cut out with the jigsaw. A furniture glaze emphasizes the grain of the wood and at the same time seals the surface. Sand the surface, lasering, grind again, glaze again.
The brackets, connect the basin and vanity top, are attached and screwed from the underside. Well overflow, Mount traps and fitting.
stencil technique
This is the simplest way, decorate furniture with ornaments. Copy the template onto a piece of paper, cutting out, fix the bow with spray paint. Position template. Apply color by dabbing with an almost dry brush.