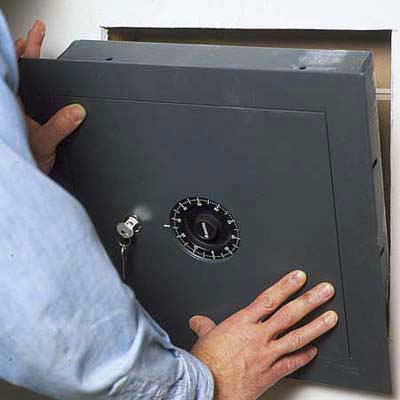
 Only a safe can optimally protect valuables from theft and fire. Provided the quality is right, and it is installed correctly. The choice is great, but for private use are light furniture inserts- and wall safes are ideal.
It should not be missing in any household, it reliably protects valuables and important papers, even then, when the roof falls on your head – The safe. This doesn't only apply to rich people. Anyone can have a safe place to keep vehicle registration documents, need a savings book or jewellery. There are dozens of safes in every hardware store – of quite different quality. In addition to their resistance to burglary, fire resistance is of course important. Even if you have to trust the information provided by the manufacturer or seller, you can easily check some things in store. Fireproof safes have a surrounding fire fold, against which the door bangs. Also the number of locking bolts, the tumblers, indicates the safety of the safe – it's mehr, the better. A certificate from the ECB^S (European Certifica-tion Board^Security Systems) suggests a safe vault. And it's not a mistake, to trust the model of a brand manufacturer more, than a no-name safe.
WANDTRESOR – INSTALLATION WITH A HAMMER, CHISEL AND CONCRETE
Before you decide on a wall safe, you must choose a suitable installation location. There are usually only three options here: in the masonry beam of a staircase, in a sufficiently thick outer wall or, like here, in an abandoned chimney. Chimneys are best, since the necessary depth for the safe installation is usually given here. When it comes to exterior walls, you quickly reach the limits of what is feasible. Additional insulation is also required here, otherwise cold bridges will occur.
The wall safe is covered all around with at least 10 cm Beton (see graphic below) encased. Ideally with B45 grade concrete. However, such a high-strength concrete is hard to find in the hardware store. Alternatively, a mixture of a screed concrete with cement in proportion is sufficient 8:1 (for example 40 kg B 03 screed concrete from Quickmix 5 kg of cement from the same manufacturer). This mixture reaches a strength of 50 Newton pro qcm, that allow the safe to easily withstand an attempted break-out. Process the concrete, working from bottom to top and back to front, So first fill the space under the safe and then layer by layer the one behind it.
1 Mit Hammer und Meißel stemmen Sie zuerst ein Loch in die Wand das 20 cm wider and higher than the safe front and 10 cm deeper than the housing.
2 Kleben Sie nun die Front des Tresors mit einer starken Folie ab, so that it does not suffer when concreting.
3 Jetzt kommt Feinarbeit: Lift the safe into the wall opening and align it with wooden blocks or bricks underneath and wooden wedges on the sides, that it sinks flush to the wall- and is horizontal.
4 Check it, if everywhere at least 10 cm of air between the masonry and the safe front.
5 Aus einer Fertigmischung Estrichbeton und Zement im Verhältnis 8:1 mix the concrete. He should be earth-moist, so that it doesn't spill out again immediately. Before setting in concrete, wet the masonry thoroughly so that the moisture is not removed from the concrete too quickly.
6 Füllen Sie mit einer schmalen Kelle den Beton in den Hohlraum. Only underneath from back to front. Then in layers behind the vault and on both sides.
7 Verdichten Sie jede Schicht mit dem Ende eines langen Hammerstiels.
8 Jetzt haben Sie etwas Zeit. Wait at least two days before opening the safe, better a week, until the concrete has hardened. Then open it, wipe dry inside and leave it open for two more days, until the last condensation has dried.