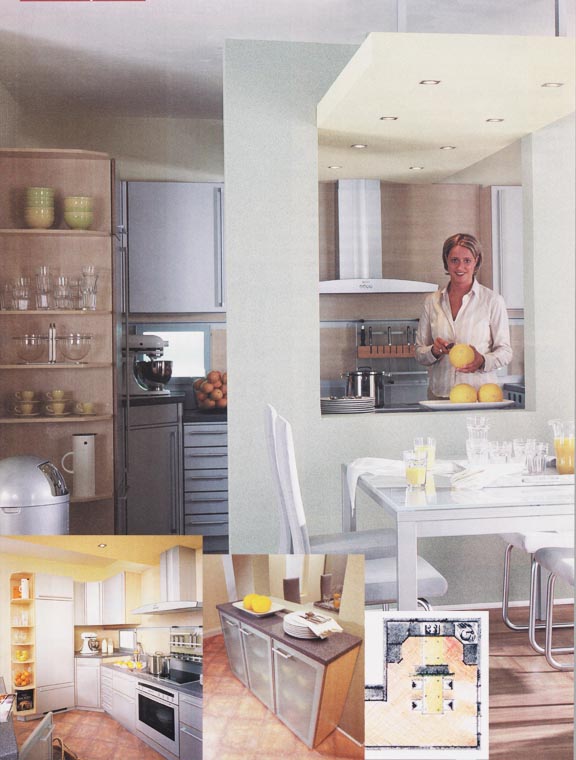
 A room divider between the kitchen and dining room is an attractive living element, which expands the possibilities of the space enormously: It separates the two areas and at the same time connects them. while you prepare the food, you can talk to your guests.
Preparing food should be just as enjoyable as eating it. A kitchen today is often not just a work space, but become part of the living area. And who has ever been a guest in an eat-in kitchen with a half-height room divider, will probably have thought about it too, whether he can do something like this at home.
Then when the decision is made, how to implement? lightweight walls, plasterboard, UW profiles are bohemian villages for you? no problem! We show you, how to deal with it. Provided you know how to use a drill, Folding rule, level, Tin snips and cutter.
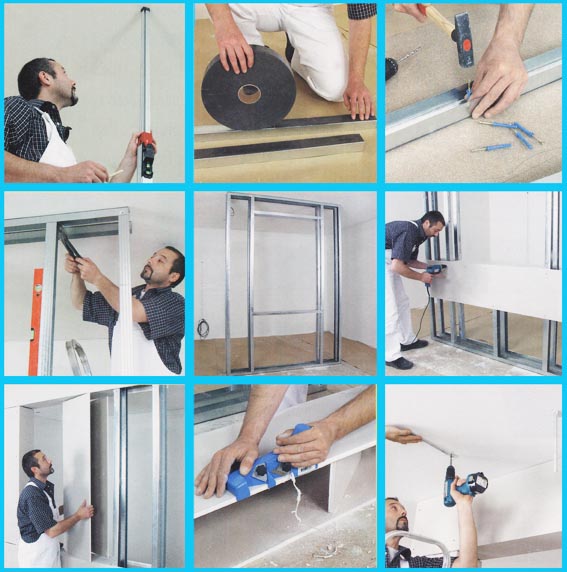 The basis: A scaffolding made of sheet metal
In order to carry out this construction proposal you have to process sheet metal profiles and plasterboard. The sheet metal profiles differ in wall- and ceiling profiles (W and D). Both are available as U-profiles, that twice, and as a C profile, edged four times and is more torsion-resistant. To achieve smooth cuts, you have to guide the tin snips at right angles to the sheet metal. Cutting plasterboard: Using the cutter and spirit level as a guide, score one side of the liner board, then crease that cutting line over a straight edge, so that the plaster breaks. Then turn the board over and cut the cardboard cover along the crease line.
1 Are the UW profiles (They are attached to the ceiling and floor!) Cut to exact size with tin snips, stick a strip of bulkhead sealing tape to the side, which will later come into contact with the floor or ceiling.
2 Now fix the profiles with screws and dowels. tip: It's even faster with drive-in dowels! To do this, drill holes in the profile and concrete and fasten the metal sheets with a few hammer blows. Be sure to, that the distance between the screw connections is never greater than 100 cm!
3 Die CW-Profile (in this case the upright sheets) in that set YOUR Profile, align and use the crimping tool (explanation page 34) connect to each other.
4 The pass-through opening is framed at the top and bottom using UW profiles. To do this, draw the inside dimension on the profile, Cut the legs at a 45-degree angle with tin snips and bend the excess upwards. Then connect everything with the crimper pliers.
5-7 Now you can plank the profiles with the gypsum boards. The joints are first chamfered with an edge planer: This will later result in a clean plaster joint!