 Outdoor facilities: Fireplace with barbecue area – Where the cozy and the culinary meet.
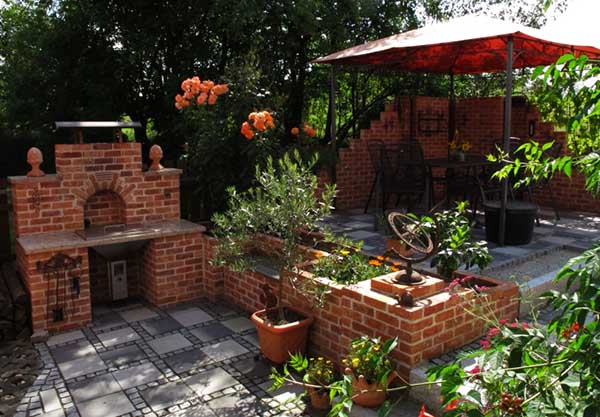
An outside fireplace – especially in combination with a seat – can be the attractive focal point of the garden. We show, how decorative it looks and how to build it.
Before you start building the fireplace and grill area, you need to determine its size and location and clarify with the building authority, whether a building permit is required or whether a building notice is sufficient.
In addition to the seating area around the fireplace, you can plan a dining area, available for every occasion. You can attach a water point to the open grill. An opening in the perimeter wall serves as a drain. It should also be possible, connect a garden hose.
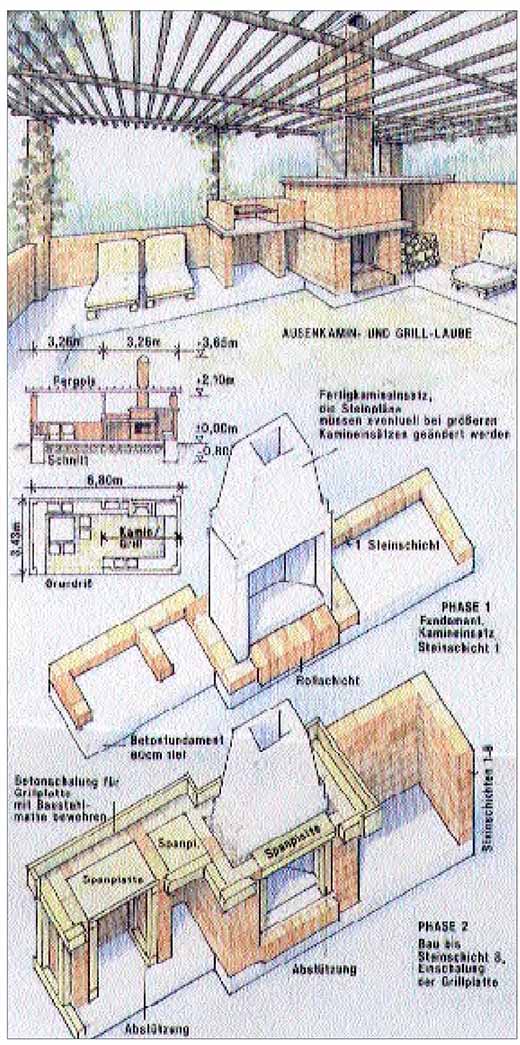
Under the grill, the niches are provided with lockable doors, so that the grills are kept safe when not in use. The benches consist of bench slabs on individual foundations. They can be shuttered continuously – about 17 to 20 cm high above the planned paving. The masonry is built directly onto the bench slabs.
Is a pergola planned over the entire area, supporting pillars are bricked up in the corners. Be sure to, that the wooden beams on top do not have to bridge too large spans. Because in such a case, intermediate pillars are necessary. The outdoor living area is covered with floor slabs made of natural stone.
To the construction phases of the fireplace grill: Based on the site plan, the approximate location of the outdoor fireplace is measured locally. Then set up the measuring frames, where you remove the topsoil and dig the foundations. Then pour the concrete into the formwork that has been coated with formwork oil.
A pergola (above) gives the system the character of an arbor. Its centerpiece is a prefabricated chimney, which the other dimensions are based on.

The chimney gradually takes shape
Place the prefabricated chimney with mortar on the foundation. Place the first layer of stones on top and measure again to be sure. Then brick up. It is advisable, lay roofing felt under the first layer, so that no moisture can rise from the concrete foundation into the masonry, or to add a waterproofing additive to the first layer of mortar for the same purpose. So-called stone plans are required for walling up, according to which you plan to lay the stone layers.
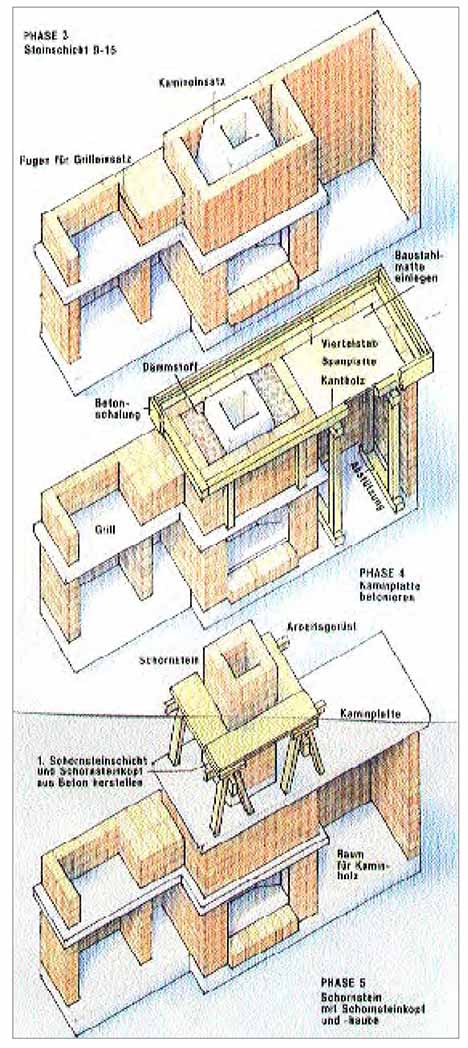
Then the concrete formwork for the ninth layer is made and set up. Concrete, possibly through the formwork, flows through the sides or in the area of the chipboard, can later be removed with a chisel. Before you concrete, you should fill the gaps between the chimney and the masonry with expanded clay or something similar.
The concrete slab is reinforced with a steel mesh. She must 2 or 3 cm from the bottom edge, so that the concrete can cover the steel evenly everywhere. Maybe it's difficult, to lay the steel mat as a whole around the chimney. Then try it in parts. A second - technically simpler – possibility is there, round bars with 6 mm diameter at intervals of 16 cm in each direction in the formwork. When the steel is brought in, you can pour in the concrete, gently shake and peel up with a board. You prevent a connection between the concrete slab and the precast insert, by using styrofoam- or insert lightweight panels. Otherwise thermal stresses can occur. For the upper parts you need a small framework, that you made from the formwork planks or. Can produce formwork squared timber. Finally, the upper cover plate is shuttered and filled with concrete.
With foundation, two concrete slabs and the 3,65 With its tall chimney, the chimney looks like a miniature multi-storey building.
